https://claycountyduilawyers.com/blogs/olli-ella-blog.atom claycountyduilawyers - claycountyduilawyers Blog 2024-04-04T21:10:22-07:00 claycountyduilawyers https://claycountyduilawyers.com/blogs/olli-ella-blog/welcome-to-the-family-lets-jazz-up-your-nursery 2024-04-04T21:10:22-07:00 2024-06-18T18:29:20-07:00 Welcome to the Family! Let's Jazz Up Your Nursery Liv Uther Are you a little tired of the traditional nursery look? Well, grab your paintbrushes; we're thrilled to help you spice up your newest family member's. 

More

]]>
Are you a little tired of the traditional nursery look? Well, grab your paintbrushes; we're thrilled to help you spice up your newest family member's. Let's dive into some unique ways to add that extra splash of personality with colours and accessories.
 
 
1 Dream up Your Design 
Before you break out the paints, take a moment to dream up your nursery's mural. Do you fancy something educational like ABCs or playful shapes? Maybe you're more into swirling colours or intricate patterns? Remember, this is a blank canvas-- the wall is your oyster! 

2 Splash on Some Colour
 
Let's talk colours! Mix and match primary shades with soft pastels or warm tones with cool ones. Bright colours are like magic to little eyes, so go ahead and pick those that make you smile. And here's a tip: Grab a few hues that match your already existing decor—it'll tie everything together beautifully! Add a special touch with our See-Ya Suitcases; they are perfect for storing toys and tie in with any aesthetic. 
 
3 Make It Yours 
Now, onto the fun part—decorating! Whether you're a DIY enthusiast or prefer ready-made goodies, there's no wrong way to spice up your nursery. Whip up some DIY wall prints or craft a mobile with our adorable Holdie Animals. And don't forget to create a cosy changing corner with our Reva Seagrass Changing Baskets. Add some gentle lighting, books, plants and their toys; it's all about creating a space that is uniquely yours! 
 
4 Add Those Extra Touches 
Ready to take it up a notch? Give your furniture a little makeover! Whether you're going for sleek, textured, or funky patterns, a fresh coat of paint can work wonders. Feeling adventurous? Use leftover wallpaper or magazine cutouts to create a collage print that's one-of-a-kind. Use your revamped furniture as a shrine for your Dinkum Doll collection! 
 
Ready to Get Started? 
Head over to our Tula Collection for a treasure trove of nursery decor delights. From changing baskets to rattan wall decor, we've got everything you need to make your nursery dreams a reality. Let's make this space as special as your newest family member! 


From Left to Right
Row 1:
Holdie Animals Magical Creatures Set
Rattan Lily Basket- seashell pink 
Cozy Dinkum- Bunny Flopsy
Row 2:
Rattan Tulip Basket - Seashell pink
See-Ya Suitcase - Leafed Mushroom
Lullaby Dozy Dinkum - Luna
Row 3:
Reva Seagrass Changing Basket - Rose
Mushroom Basket – Musk 


]]>
https://claycountyduilawyers.com/blogs/olli-ella-blog/welcoming-a-new-sibling 2024-02-27T15:00:32-08:00 2024-02-27T15:00:32-08:00 Toddler Transitions: Welcoming A New Sibling Liv Uther Preparing Your Toddler for a New Baby: Explore the Magic of Lullaby Dozy Dinkum Dolls

More

]]>

Welcoming a new baby into the family is an exciting, albeit sometimes challenging, transition for toddlers. As parents, we're always on the lookout for ways to make this journey smoother and more joyful. Enter the magical world of Dozy Dinkum Dolls – your toddler's perfect companion in navigating the adventure of new siblinghood.

~

  • The Power of Play

    Dozy Dinkum Dolls are storytellers, confidants, and playmates all in one. Encourage your toddler to engage in pretend play with their Dozy Dinkum, weaving stories of their own sibling adventures. This opens a world of communication and expression, allowing your little one to share feelings and emotions in a safe and playful environment.

  • Mirror on the Doll 

    Toddlers learn by observing and imitating. Use Dozy Dinkum Dolls to teach gentle and caring behaviors. Show your toddler how to cradle and comfort the doll, and explain that soon, they'll get to do the same for their new baby brother or sister. It's a beautiful way to instill a sense of responsibility and empathy.

  • Bedtime Bonding

    Bedtime routines are sacred for toddlers, and the addition of a Lullaby Dozy Dinkum Doll can turn this routine into a magical bonding experience. Create a cozy bedtime ritual where your toddler tucks in their Dozy Dinkum and pulls their cord to play a soft lullaby, mirroring the care they'll soon provide for their new sibling. This shared routine not only fosters a sense of connection but also eases the transition to a new bedtime dynamic.

  • Cuddly Confidants

    Sometimes, expressing emotions can be challenging for toddlers. Dozy Dinkum Dolls become a non-threatening channel for them to communicate their feelings. If your little one is feeling excited, nervous, or even a bit confused about the upcoming changes, encourage them to share these emotions with their doll. This simple act can open the door for meaningful conversations about their evolving family.

  • Team Lullaby Dozy Dinkum

    Make your toddler feel like an essential part of the sibling team by involving them in preparations. Let them help choose a Lullaby Dozy Dinkum Gift Set for the new baby, with their own Dozy Dinkum by their side. This collaborative effort makes them feel valued and establishes a sense of camaraderie as they eagerly anticipate their new sibling's arrival.


]]>
https://claycountyduilawyers.com/blogs/olli-ella-blog/craft-your-own-dinky-dinkum-flower-hat 2024-01-03T17:51:59-08:00 2024-01-03T17:51:59-08:00 Blooming Fun: Craft A Dinky Dinkum Flower Hat Liv Uther Dive into a delightful crafter-noon and make floral hats for your kiddos to match their Dinky Dinkum Blossom Buds.

More

]]>

We teamed up with @liddierowl on our latest DIY adventure to combine the charm of Dinky Dinkum Blossom Buds with the magic of handmade flower hats! Dive into a delightful crafter-noon and make floral crowns for your kiddos to match their Blossom Buds. Let your imagination bloom alongside your Dinky Dinkum friends!

~


  • Step 01 

    Start by cutting a circle out of cardboard (a little larger than the size of your child’s face). Cut a smaller circle within your original circle to create a cardboard ring approximately 1.5" in width.

  • Step 02 

    Cut petals out of colored foam. You can use whatever shape and color you like. We used around 9-12 petals, but it will all depend on the petal shape chosen and width of your child's face.

  • Step 03 

    With a hot glue gun, glue petals to the back of your cardboard ring. Wait for the glue to dry before moving on to Step 4. 

  • Step 04 

    Cut a 2.3" strip of yellow felt and make small cuts along one side of the strip it to create a fringe. Cut the strip into segments and glue around the center of your flower using your hot glue gun (covering up your cardboard ring).

  • Step 05

    Turn the flower over and punch two holes, one at either side of your cardboard ring, using a hole punch. Attach elastic string to your flower hat (approximately 7.8" long - but measure on your child’s head first for the exact length required.) Double knot your string to either side of the hat.

  • Step 06 

    Your flower hat is ready to twinkum with your Dinky Dinkum Blossom Buds!


]]>
https://claycountyduilawyers.com/blogs/olli-ella-blog/crafting-cozy-knit-hats-for-dinkum-dolls 2023-12-17T19:09:21-08:00 2023-12-17T19:09:21-08:00 Crafting Cozy Hats for Your Dinkum Dolls Liv Uther Say goodbye to chilly days and hello to cozy vibes as we show you how to whip up adorable, no-knit hats that will have your Dinkums looking extra cute and snug.

More

]]>

Get ready to level up your Dinkum Dolls' winter wardrobe with a touch of DIY magic! Say goodbye to chilly days and hello to cozy vibes as we and @hellominibianco show you how to whip up adorable, no-knit hats that will have your Dinkums looking extra cute and snug. Follow along for a step-by-step guide 🧶❄️

~

  • Step 01 

    Measure your Dinkum Doll’s head (leaving an additional 0.7" at the end to glue the tab) and cut a cardboard strip to size (approx. 0.7" - 1.1" wide). With a hot glue gun or stapler, join the ends to make a circle. This will be the base of your knit hat.

    Cut 30 - 40 pieces of yarn that are 16" - 18" long depending on the doll's head size and yarn thickness.

  • Step 02 

    Double up each piece of yarn and make a loop around the piece of cardboard. Pull the ends of the yarn through the loop.

  • Step 03 

    Repeat Step 2 until the cardboard base is filled. Make sure to pull each piece of yarn tightly so it stays in place.

  • Step 04 

    Twist and push the ends of the yarn through the hole so you turn the hat inside out.

  • Step 05

    Use a piece of yarn to tie a double knot.

  • Step 06 

    Trim off the excess yarn to create a pompom shape. And voila! A cozy, no-knit hat for your Dinkum Doll.

]]>
https://claycountyduilawyers.com/blogs/olli-ella-blog/dinky-dinkum-collector-cards 2023-11-28T10:52:59-08:00 2024-09-16T19:38:45-07:00 Dinky Dinkum Collector Cards Liv Uther Sticker by sticker, watch your Dinky Dinkum collections grow! Download our free collector lists for each Dinky series and collect them all! 

More

]]>

Sticker by sticker, watch your Dinky Dinkum collection grow! Download free collector lists for each Dinky series and tick off the ones you have. Each limited-edition series is on available for a short time - collect them all! 

~

  • Series 02 Forest Friends

    Download Collector Card - there's always mushroom in the playroom for all 6 Forest Friends.

  • ]]>
    https://claycountyduilawyers.com/blogs/olli-ella-blog/benefits-of-sensory-play-for-kids 2023-10-03T12:02:49-07:00 2023-10-03T12:02:50-07:00 Tubbles Sensory Stones: Nurturing Little Minds Through Play Liv Uther Tubbles Sensory Stones are made to spark creativity, encourage exploration, and make every moment brim with fun and discovery, igniting your child's senses. Let's jump right into the exciting world of sensory play and delve into the wide range of benefits for children's development and overall well-being.

    More

    ]]>

    Tubbles Sensory Stones are made to spark creativity, encourage exploration, and make every moment brim with fun and discovery, igniting your child's senses. Let's jump right into the exciting world of sensory play and delve into the wide range of benefits for children's development and overall well-being.


    ~

    • Cognitive and Language Development

      As your little explorer squishes and molds, their brain is firing on all cylinders, making connections and piecing together the world around them. Sensory play is a language class disguised as fun! Words come alive as they describe the gooey texture of slime or the smooth sensation of Tubbles, encouraging your child's vocabulary to bloom as they chatter away about their colorful experience.

    • Social Skills

      Sensory play is the perfect setting for mini social gatherings. Picture your child and their friends huddled around a tray of sensory treasures. They're sharing, negotiating, and cooperating—all vital life skills disguised as playtime. Sharing sensory materials and space can sometimes lead to disagreements among children. These moments allow for them to develop conflict-resolution skills, empathy, and practice turn-taking.

    • Fine Motor Skills

      Tiny hands, big achievements! Sensory play often involves activities like squeezing, pinching, and manipulating objects with various textures. These actions require the use of hand muscles, which become stronger through sensory play. This exploration enhances hand-eye coordination as kiddos learn to control their movements while visually tracking what they are doing.

    • Creativity 

      Sensory play is a powerful tool for nurturing creativity in children. It encourages them to explore and experiment with the world around them. Sensory materials, like sand, playdough, or water, act as blank canvases for the imagination. Kids can mold, shape, and transform these materials into anything their creative minds conceive, from magical creatures to fantastical landscapes.

    • Problem Solving

      During sensory play your child becomes an investigator, figuring out the mysteries of textures, shapes, and colors. When faced with something new or unfamiliar, they often need to figure out how to interact with it effectively, like mixing paint to achieve the desired colour. 

    • Preparation for School

      Sensory play is more than just fun; it's a vital preparation for your child's journey through school. As they explore different textures, shapes, and materials, they're laying the foundation for academic success. Sensory activities engage their senses, fostering a deep love for learning that will carry them through their educational years. 


    ]]>
    https://claycountyduilawyers.com/blogs/olli-ella-blog/halloween-costumes-and-baskets-for-kids 2023-09-13T22:02:01-07:00 2023-09-13T22:02:01-07:00 Trick-Or-Treat In Style: Halloween Costumes & Candy Carriers For Kids Liv Uther Cast a spell of delight on your little trick-or-treaters with a unique Halloween costume to pair with their basket of choice.

    More

    ]]>

    Cast a spell of delight on your little trick-or-treaters with a unique Halloween costume to pair with their basket of choice. From a hootin’ cute owl to a buzzy bee, and all your classic favorites in between, make your kids the stars of the night. 

    ~

    • Purr-fectly Witchy Duo

      Cozy Dinkum Nox and black laced tied around the handle of a Berry Basket make adorable accessories for this bewitching ensemble! 

    • Hoot-tastic Owl

      Whoo's ready for Halloween? This little owl is, of course, complete with a Stripe Berry Basket.

    • Spook-tacular Ghost

      All you need for this costume is a piece of white fabric - easy peasy! Add battery-operated fairy lights to a Mushroom Basket to cast a spooky glow.

    • Buzzy Bee

      The Luggy Basket is one of our faves for trick-or-treating! Kiddos can keep their hands free, plus it holds so much candy! 

    • Cap-tivating Cutie

      Pair the Red Mushroom Luggy with a DIY toadstool costume for an adorable Halloween look. 

    • Petal Princess

      Pair our Castle Bag with a princess-like lace dress and blooms from the garden for an easy enchanting costume. Perfect for last-minute party-goers! 

    • Little Lion

      Bring a Cozy Dinkum Lion along for a roar-tastic Halloween adventure in a Luggy!

    • Reach For The Stars...And Candy! 

      Yee-haw! This little trick-or-treater is ready to tote a Chari Bag AND Luggy for the ultimate Halloween haul. 

    • Red-dy For Fun!

      With a Casa Clutch in hand, this classic fairytale get-up is sure to be a fan-favorite with your kiddos. 

    • Granting Wishes, Not Tricks

      Our whimsical Mushroom Basket is a generous size for gathering candy, and is fairy-ly adorable paired with any princess costume.

    ]]>
    https://claycountyduilawyers.com/blogs/olli-ella-blog/craft-an-enchanted-cat-wand 2023-09-13T21:48:34-07:00 2023-09-13T21:48:34-07:00 Whisk Up Some Magic: Craft An Enchanted Cat Wand Liv Uther Brew up some Halloween magic with our DIY Magic Wand Craft – Cozy Cat edition! Whether it's the finishing touch for a trick-or-treat costume, or simply a rainy-day craft at home, our Magic Cat Wand is sure to add a touch of sparkle to every playtime. 

    More

    ]]>

    Brew up some Halloween magic with our DIY Magic Wand Craft – Cozy Cat edition! Whether it's the finishing touch for a trick-or-treat costume, or simply a rainy-day craft at home, @crystal.leigh.photography’s Magic Cat Wand is sure to add a touch of sparkle to every playtime. 

    ~

    • Step 01 

      With a white pencil, draw two cat face shapes (ensure they are the same size) onto cardboard or brown cardstock. These shapes will be the front and back of your Cat Wand. Cut the shapes out with scissors (or an exacto knife). 

    • Step 02 

      Draw a heart-shaped nose and cat ear details onto either a piece of cardboard or pink/red felt, and cut them out. Glue the shapes onto your cat's face.

    • Step 03 

      Draw your cat's mouth and eyes with black marker and use a pink crayon to add rosy cheeks.

    • Step 04 

      Tape or glue a wooden stick to the back of your cat face. Take the second cat head shape and glue it onto the back. This will cover and secure the stick.

    • Step 05

      Draw and cut out a little witch hat, using either felt or black cardstock. Glue the hat onto your Cat Wand. 

    • Step 06 

      Add extra decorations to your Cat Wand - spots, stripes, ribbon, and glitter, whatever you like!

      ]]>
      https://claycountyduilawyers.com/blogs/olli-ella-blog/diy-forest-friends-pennant-flag 2023-08-31T21:11:30-07:00 2023-08-31T21:11:31-07:00 Raise Some Fun: DIY Forest Friends Pennant Flag Customer Happiness Account Repurpose your Forest Friends cardboard display stand into DIY pennant flags for the playroom! We teamed up with our endlessly creative pal @cardboardfolk to craft personalized bunting featuring the Dinky Dinkum Forest Friends camp badges.

      More

      ]]>

      Repurpose your Forest Friends cardboard display stand into DIY pennant flags for the playroom! We teamed up with our endlessly creative pal @cardboardfolk to craft personalized bunting featuring the Dinky Dinkum Forest Friends camp badges. Don’t have the box set? Download the printable template for your kids to color and use for this craft. Take a walk on the wild side to the magical world of Dinky Dinkums Forest Friends and embark on a crafty adventure with your kiddos. 

      ~

      • Step 01 Prepare The Badges

        Grab your Dinky Forest Friends cardboard display stand (or download the printable version) and use scissors to cut around the badge icons and any other illustrations you like. You can also use the stickers on your Dinky's swing tag. If using the printable badges, reinforce the printer paper by sticking the shapes to cardboard. 

      • Step 02 Turn Your Badges Into Stickers

        Attach the scratchy side of the velcro to the back of your badges. Use glue if your velcro isn't self-adhesive. 

      • Step 03 Shape Your Flag

        Take a piece of felt (we used an A4-sized sheet) and trim the bottom into a point using scissors. 

      • Step 04 Attach The Dowel

        Place the craft dowel at the top straight edge of the flag. Run a bead of fabric glue all the way across the top of the felt. Fold the top of the felt over the dowel to cover it and hold in place until the glue starts to set. You may want to use pins or masking tape to keep it in place while the glue dries.

      • Step 05 Attach The String

        Cut a piece of string about 24" long and tie the ends to each side of the craft dowel to create a hanger. 

      • Step 06 Personalize Your Flag

        Grab a piece of contrasting coloured felt and cut out letters to personalize the flag with your child's name. We printed our letters in a blocky font and used them as a template to trace onto the felt, but you can also draw by hand before cutting. Use fabric glue to attach them to the banner.

        • Step 07 Attach Badges To The Flag

          Lastly, attach your Dinky badges to the flag by pressing the velcro-backed badge firmly to the felt fabric. You can move and swap your badges as often as you'd like!

      ]]>
      https://claycountyduilawyers.com/blogs/olli-ella-blog/dressing-up-for-book-week-delight 2023-08-10T13:32:11-07:00 2023-08-10T13:33:27-07:00 Dressing Up For Book Week Delight Customer Happiness Account Whether you're an ardent bookworm or simply looking for a last-minute costume, we've got your kiddos covered for Book Week!

      More

      ]]>

      Book Week is a celebration like no other, where kiddos don the guise of beloved characters who have captured their hearts and minds. Whether you're an ardent bookworm or simply looking for a last-minute costume that isn't Elsa or Batman, we've got you covered!

      ~

      • 01 Fairy Princess

        Add a touch of whimsy to any fairytale-inspired costume with our magical Mushroom Basket. Pair the look with Olivia and the Fairy Princesses by Ian Falconer.

      • 02 Dear Zoo

        Dear Zoo by Rod Campbell is a classic favorite. Bring Dinkum Dog Buddy along for a Book Week costume that will never go out of style. 

      • 03 The Little Mermaid

        Sure to be a favorite look at Book Week this year, pick up a Shell Bag for your Little Mermaid. Originally a dark tale by Hans Christian Andersen, take a peek at the kid-friendly version for preschoolers by Ronne Randall. 

      • 04 The Wizard of Oz

        Dorothy and the Lion, Tin Man, Scarecrow and Toto make adorable ensembles for siblings. Introduce your kiddos to this beloved classic by reading a chapter of The Wizard of Oz by L. Frank Baum at bedtime. 

      • 05 Buzzy Bees

        Illuminate your child on the magic of bees with The Honeybee by Kirsten Hall. Tote a Luggy-ful of native flowers along with your book in the parade. 

      • 06 Little Red Riding Hood

        For teachers and parents partaking in the parade, we recommend The Little Red Riding Hood by Mara Alperin for a fun-filled cover idea.


      SHOP BOOK WEEK ACCESSORIES

      ]]>
      https://claycountyduilawyers.com/blogs/olli-ella-blog/play-on-the-go-toys-crafts-to-keep-kids-entertained 2023-08-06T21:43:15-07:00 2023-08-09T21:24:04-07:00 Play On-The-Go: Toys & Crafts To Keep Kids Entertained Customer Happiness Account Good old-fashioned, screen-free, creative fun to keep little ones entertained! Tiny dolls, mini animals, and portable play sets for imaginative play, all while mom and dad run errands, sip coffee, and go on family road trips. Have a look at what we’ve got for you!

      More

      ]]>

      Good old-fashioned, screen-free, creative fun to keep little ones entertained! Tiny dolls, mini animals, and portable play sets for imaginative play, all while mom and dad run errands, sip coffee, and go on family road trips. Have a look at what we’ve got for you!

      ~


      • 01 Compact Colouring

        Take the fun wherever you go with Playpa Mini - a portable playtime pal! Designed to fit in a carry bag, the compact 14.5cm box includes a 26 ft roll printed with a rolling adventure and four crayons. Playpa Mini is a must to keep kids entertained in cafes, on planes, or in holiday accommodation.

      • 02 Pocket-Sized Plushies

        Bring Playpa Mini creations to life with Holdie World counterparts! Explore the depths of the Ocean with our Marine and Ocean Animals, and Mermaids. Trek the Forest with Princess Gloribel and Wanda the Witch! Made for little hands to hold, kids will love the portability of our pocket-sized Holdie dolls. 

      • 03 DIY Activity Kit

        Curate a grab bag full of travel fun with a repurposed See-ya Wash Bag. Fill with goodies like Holdie World friends, crayons, stickers, small cars, fidget spinners and pop-its, and snacks. Pro tip: for long journeys, wrap each individual item in gift paper to prolong the fun and give your restless kiddos a task to focus on as they unwrap each delight. 

      • 04 All-In-One Caddy

        The Mini Chari Bag is a multi-use shoulder bag that easily converts into a backpack. Strap it to your little one or their bike and keep hands free for exploring and collecting treasures on the go! 

      • 05 Pack, Play, And Explore

        The See-ya Suitcase gives kids independence on road trips and sleepovers, plus it's great for toting all the must-haves that accompany your kids on day trips too! If you're feeling brave, ask your little one to pack their own carry-on so you can enjoy a surprise fashion show of mismatched socks, toys, and snacks you never knew you had! 

      • 06 Ready, Set, Roll!

        For wheely big adventures, we recommend packing travel activities, snacks, and a warm sweater into a Luggy or Wonder Wagon. Pulling is easier than carrying, and the novelty for kids of wheeling their own basket will hopefully mean one less item for overloaded caregivers to carry!


      ]]>
      https://claycountyduilawyers.com/blogs/olli-ella-blog/diy-dinkum-doll-spa-day 2023-07-10T23:28:53-07:00 2023-07-10T23:31:07-07:00 DIY Dinkum Doll Spa Day Customer Happiness Account Even the smallest members of the family need some R&R every now and then. We teamed up with our creative play-mate @raisingwildones for lots of fun ways to make Dinkums Dolls (and your kiddos) sparkle with joy!

      More

      ]]>

      Life as a Dinkum BFF can be sticky business! Whisk your Dinkums away for a spa day and explore a whole new world of imaginative play! We teamed up with our creative play-mate @raisingwildones for lots of fun ways to make Dinkums Dolls (and your kiddos) sparkle with joy! Gather the cardboard cucumber slices, and get crafting.

      ~

      YOU WILL NEED:

      Cardboard (lots of it)
      Paints (we recommend poster or acrylic)
      Paint brushes
      Decorative pens, pencils & markers
      Scissors
      Masking tape
      Hot glue gun (optional)
      Paper fastening pin (to make cardboard scissors)
      • 01 Stock Your Salon

        Enlist little helpers to create cardboard props for the perfect spa day! We decorated cardboard scissors, combs, and nail polish pots with paint and markers.

      • 02 Craft Your Tools

        Repurpose two cardboard toilet rolls to make a pretend hair dryer. Bonus points if you add Dinkum-themed rainbows to the design!  

      • 03 Sprinkle Some Hair Magic

        Craft little cardboard rainbows and hot glue them to bobby pins to make Dinkum-themed barrettes! 

      • 04 Pamper Dinkum Mamas and Papas

        Use the Big Blossom Basket as a bonnet hood hair dryer, and cardboard toilet rolls make fun big curlers!

      • 05 Snip Snip

        Craft cardboard scissors and fasten with a paper push pin. Keep little hair cutting enthusiasts happy all day - without the emergency trip to a real hair stylist! 

      • 06 Find Your (Dinkum) Bliss

        It's not a spa day without (cardboard) cucumber slices! And don't throw your Dinkum packaging away. It makes the perfect Dinkum-sized salon chair.


      ]]>
      https://claycountyduilawyers.com/blogs/olli-ella-blog/colouring-magic-with-paper-dinkum-dolls 2023-06-27T13:59:45-07:00 2023-07-05T13:14:26-07:00 Coloring Magic with Paper Dinkum Dolls Customer Happiness Account Come on a colorful adventure with your very own paper Dinkum Doll! Grab your favorite set of markers and craft one-of-a-kind Dinkum Dolls that are as unique as you are. From rosy cheeks to vibrant outfits, the possibilities are endless!

      More

      ]]>

      Come on a colourful adventure with your very own paper Dinkum Doll! Grab your favourite set of markers and craft one-of-a-kind Dinkum Dolls that are as unique as you are. From rosy cheeks to vibrant outfits, the possibilities are endless!

      ~

      ]]>
      https://claycountyduilawyers.com/blogs/olli-ella-blog/magical-mushrooms-fairy-bedroom-decor 2023-06-06T20:32:11-07:00 2023-06-06T20:32:11-07:00 Magical Mushrooms: Fairy Bedroom Décor Customer Happiness Account Welcome, dreamers, to a whimsical journey into the enchanting world of fairycore room décor! Join us as we explore the key elements of fairycore style and discover how to infuse your room with a touch of magic and fantasy.

      More

      ]]>

      Our magical Mushroom crop has grown! This collection inspires woodland adventures and cozy days snuggled inside. With these fabulous fungi in mind, step into a world of enchantment and build the perfect fairycore-inspired space for your kiddo, and discover how to infuse their room with a touch of wonder. 

      ~

      • 01 Nature-Inspired Accents

        Bringing nature indoors is an essential part of fairycore décor. Incorporate elements like a Porcini BasketMushroom Basket, or Mushroom Luggy. Dried flowers, branches, and lush greenery add to the vibe. You could even create a fairy garden in a corner of your child's room, complete with miniature houses and tiny mushrooms. 

      • 02 Whimsical Lighting

        Twinkling fairy lights hidden in a Mushroom Basket will cast an enchanting glow (and double as a night light). Get creative with lanterns, paper star lamps, and jam jars filled with fairy lights for a touch of whimsy that every fairycore space needs. 

      • 03 Pastel Paints

        Take inspiration from nature, or stick with classic fairy floss colors like lavender, blush, mint, and soft blue. Consider painting your walls or adding whimsical wallpaper to set the tone. We wish we had a magic wand for this job! 

      • 04 Cozy Comforts 

        Soften the space with floral sheets, fluffy pillows, and rugs. Complete the magical look with a stack of fairytale favorites. Bonus - kiddos can repurpose their fairy-themed soft furnishings for reading nooks and secret hideaways. 

      • 05 Whimsical Wall Art

        Hang framed prints of enchanted forests, fairies, and magical creatures. You could also create your own artwork by framing pressed flowers. A fun activity to do with your minis, check out our Flower Pressing Guide. Kids will love joining in on the decorating process by gathering their own blooms for their room. 

      • 06 Vintage Treasures

        Visit thrift stores or flea markets to discover antique picture frames, delicate teacups, or ornate mirrors. These timeless treasures will add a touch of nostalgia and wonder to your child's room. 

      ]]>
      https://claycountyduilawyers.com/blogs/olli-ella-blog/big-benefits-of-playing-with-dolls 2023-05-04T02:49:51-07:00 2023-07-05T13:19:00-07:00 Big Benefits Of Playing with Dolls Customer Happiness Account Play is a child's way of engaging and making sense of the world. Role play may appear to be an amazingly simple activity, yet children learn practical life skills within it. It's so important to encourage a special bond with your little one and their dolls. Here's why...

      More

      ]]>

      Play is a child's way of engaging and making sense of the world. Role play may appear to be an amazingly simple activity, yet children learn practical life skills within it. Between the ages of two and three, kiddos begin to explore the world of imaginative play. Not only does this type of play teach children important skills like feeding, dressing, and caring for others, it also taps into developing social skills and empathy. Read on for more benefits and tips to encourage a special bond with your little one and their doll

      ~

      “When children create imaginary worlds and role play with dolls, they communicate at first out loud and then internalize the message about others’ thoughts, emotions and feelings. This can have positive long-lasting effects on children, such as driving higher rates of social and emotional processing and building social skills like empathy that can become internalized to build and form lifelong habits.” - Dr Sarah Gerson, a neuroscientist at Cardiff University. 

      • Introduce Problem Solving

        Assist your kiddo by introducing incidental learning opportunities. For example, during pretend mealtimes, you might ask your child questions like, "what's on the menu today?", or "what happens next?". Prompt critical thinking by inserting dilemmas that your child will have to solve e.g., "oh no! Dolly's food is too hot to eat". Your kiddo can work through these tricky scenarios with guidance. 

      • Foster Creativity

        Allow children to explore and act out different scenarios that they may not be able to experience in real life. For example, dining at a restaurant with mum & dad, or nurturing their own little doll baby - perfect for kiddos who are about to welcome a younger sibling. 

      • Promote Physical Development

        Fun activities such as dressing a Dinkum Doll in shoes and socks are great for developing hand-eye coordination. Provide a box of props filled with doll clothes and accessories for your child to explore their own sense of style. Teach personal hygiene habits like brushing hair and acting out bath time routines. 

      • Teach Language Skills

        Expand your child's vocabulary by encouraging them to describe the way they are playing with their dolls. Ask them to describe the scenario (e.g., "we are riding a pretend bus to the shops"), and encourage them to vocalize emotions ("we are excited to be on a bus!"), and the conversation between your child and their doll.

      • Develop Social Skills and Empathy

        Playing with dolls encourages children to learn about and consider other perspectives during solo and group play. Model empathetic behavior during playtime and encourage children to talk about their thoughts and emotions to further develop these crucial skills. 


      Tips For Encouraging Imaginative Play
      Rediscover your inner child and model familiar routines with props like a toy bottle or hairbrush. Show your child how to gently rock, feed, and groom their doll. This will prompt your child to mirror your behavior.
      Boost creativity with plenty of props and playmates (adults and kiddos alike). Allow your child as much time as they like to play and explore the imaginative worlds they create.
      Involve your kiddos in daily chores and turn everyday asks into an opportunity to learn whilst playing. Your child could have their own cloth to wipe a surface, or assist in the kitchen with child-safe utensils or with an empty bowl and spoon to do their own pretend cooking.

        ]]>
        https://claycountyduilawyers.com/blogs/olli-ella-blog/diy-cardboard-safari-truck-craft 2023-04-26T21:50:51-07:00 2023-04-26T21:50:51-07:00 DIY Cardboard Safari Truck Craft Customer Happiness Account Take a ride on the wild side in our DIY Cardboard Safari Truck! We teamed up with @cardboardfolk to create an off-road car for your Cozy Dinkum animals.

        More

        ]]>

        Take a ride on the wild side in our DIY Cardboard Safari Truck! We teamed up with @cardboardfolk to create an off-road car for your Cozy Dinkum animals. Whether it's exploring the vast plains of the living room or navigating the treacherous jungles of the backyard, this little truck is always up for a fun-filled adventure! Let’s get crafting... 

        ~

        You Will Need: 
        Cardboard box (we used an claycountyduilawyers shipping box about 7.9" x 7.9" x 11.8") 
        Pencil 
        Steel ruler 
        Hot glue gun or masking tape 
        Sharp scissors and box cutter (for grown-ups only)  
        Scrap piece of cardboard 
        Black marker 
        4 x jar lids 
        Cutting mat or  scrap cardboard (to protect your work surface) 

        Paint and brushes

        • 01 Mark Up the Box

          Draw the outline for your truck body onto the cardboard box as shown using a pencil and a ruler. Line 1 should be 0.8" shorter than the height of your box flaps.

        • 02 Cut Out the Car

          Using a steel ruler as a guide, carefully cut along the lines with a box cutter. Use the piece you just cut as a template to cut out the other side of the box. If needed, use a pair of sharp scissors to tidy up the edges.

        • 03 Round the Front Panel

          On the left-over box flap, trace an arc around a bottle top to round off the corners. Cut around the arcs with scissors. 

        • 04 Fit the Hood

          Cut a rectangle from the scrap cardboard big enough to create the hood of the truck. Wrap the ends around a pencil so they will curve over the arcs you cut in Step 3. Hot glue the hood in place. If you don't have a glue gun, use masking tape instead.  

        • 05 Make the Windshield

          Cut a rectangle from the left-over pieces of cardboard to fit inside the car and finish about 4" above the hood. Cut a windscreen out of the top of the rectangle, then glue or tape it in place. 


        • 06 Draw the Grille

          Use a black marker to decorate your truck with a grille and headlights.

        • 07 Make and Attach the Wheels

          To make the wheels, cut out 4 circles from the left-over cardboard about 4" in diameter. Colour the tires in black (or paint them), leaving a plain circle in the middle for the rims. Glue the wheels to your jar lids. Next, glue the wheels on to the truck, making sure they sit evenly. 

        • 08 Decorate Your Ride

          Now for the run part! Decorate your truck to match your Cozy Animal's personality like our Zebra Mini and Lion Pip wagons. You might also like to attach some personalized plates (scroll down for our plate suggestions). Your Cozy Dinkums are ready to safari in style!

        ]]>
        https://claycountyduilawyers.com/blogs/olli-ella-blog/postcards-from-portugal 2023-04-26T13:34:21-07:00 2023-04-26T13:34:21-07:00 Postcards from Portugal Customer Happiness Account Our new See-ya Collection went on a little trip to sunny Portugal! Discover a place where endless play and adventure await, as seen through the eyes of young adventurers. Buckle up, @gemmaboothphoto will take us there! 

        More

        ]]>

        Our new See-ya Collection went on a trip to sunny Portugal! Discover a place where endless play and adventure await, as seen through the eyes of young adventurers. Pack your bags and buckle up little wanderers, @gemmaboothphoto will take us there! 

        Shop the See-ya Collection

        ~

        ]]>
        https://claycountyduilawyers.com/blogs/olli-ella-blog/make-fruity-cuties-yogurt-parfait-in-granola-cups 2023-03-10T01:38:24-08:00 2023-03-10T01:38:24-08:00 Make Fruity Cuties Yogurt Parfait In Granola Cups Customer Happiness Account Take your brekkie game to the next level with these Dinky Dinkum-inspired treats. We teamed up with our friends @evermorelong and the Fruity Cuties to make scrumptious yogurt parfait in granola cups.

        More

        ]]>

        Take your brekkie game to the next level with these Dinky Dinkum-inspired treats. We teamed up with our friends @evermorelong and the Fruity Cuties to make scrumptious yogurt parfait in granola cups. We can’t guarantee that your kiddos will actually eat the fruit, but we can promise they’ll have fun baking. Tea party anyone?

        ~

        Makes 12 medium cups or 6 XL cups
        Prep time: 5 minutes
        Cook time: 15-18 minutes
         
        Granola cups:
        3 cups oats
        ¾ cup sweetened condensed milk
        ½ tsp vanilla extract
        ½ tsp salt
        ½ cup sweetened shredded coconut
        Cooking spray OR muffin tin liners
         
        Filling:
        Yoghurt
        Fruit of choice, chopped into small pieces
        Additional topping options: shredded coconut, bee pollen, hemp seeds, chia seeds
        • 01 Prep 

          Preheat oven to 350°Spray the tin with a cooking spray or line with muffin cups.

        • 02 Mix 

          In a large bowl combine oats, condensed milk, vanilla, salt, and coconut. Mix well with a wooden spoon. 

        • 03 Shape 

          Using a smaller spoon, fill the muffin tins with the granola mixture. When each cup is full, use the flat end of the spoon to firmly press down and shape the granola into a cup so it looks like a little bowl.

        • 04 Bake 

          Bake at 350° for 15-18 minutes. Keep an eye on the granola cup edges. Once they start to brown, remove the muffin tin from the oven.  

        • 05 Cool 

          Allow the granola cups to cool almost completely before removing from the tray. Store extra cups in a sealed container at room temperature. Keep for up to 1 week or freeze up to 3 months.

        • 06 Decorate 

          To serve, scoop yogurt of choice into the granola cup and top with fruit and any additional toppings. Encourage little hands to get involved and create their own breakfast masterpiece!

        Now for the best bit! Enjoy a delicious fruity (and a little bit fancy) parfait cup with your kiddos and their Dinky Dinkums friends!
        Choose your Dinky Dinkum sous-chef...
        ]]>
        https://claycountyduilawyers.com/blogs/olli-ella-blog/paint-your-own-cozy-dinkum-easter-eggs 2023-03-02T19:58:53-08:00 2023-03-02T19:58:53-08:00 Paint Your Own Cozy Dinkum Easter Eggs Customer Happiness Account You’ve heard of hand-painted Easter eggs, but have you ever seen an egg as delightful as our Cozy Dinkum-themed hatchlings? Our friend @cardboardfolk dreamed up an egg-cellent DIY craft for your kiddos and their Cozy Dinkums.

        More

        ]]>

        You’ve heard of hand-painted Easter eggs, but have you ever seen an egg as delightful as our Cozy Dinkum-themed hatchlings? Our friend @cardboardfolk dreamed up an egg-cellent DIY craft for your kiddos and their Cozy Dinkums. Roll up your sleeves mum, dad, grandma, and Funcle Tom, let's get crafty.   

        ~

        You will need:

        Eggs
        Paint & paintbrushes
        A pencil
        Thin cardboard (like a cereal box)
        Scissors
        Paint pens or markers
        Glue (PVA or a glue gun - with help from a grown up)
        Cozy Dinkum friends  

        •  01Gather Your Googies
          Ever tried to paint a raw egg? We don’t recommend it. Avoid messes by hard-boiling them first. Place room temperature eggs in a saucepan and cover with cold water, bring to the boil, and cook for 10 minutes, then allow the eggs to cool. 
        •  02Get Your Mini Picasso On
          Mix paint colours to match your Cozy Dinkum and cover the entire egg with two coats. TIP: slice a TP roll to create a base for the egg, like an egg cup. Consider using a hair dryer to dry wet paint between coats.  
        •  03Add A Cute Little Face
          Use paint and markers to create Cozy Dinkum faces for the eggs. We used a pencil to lightly draw the outline before adding facial features with a black paint pen.
        •  04Add Eggs-tra Personality
          We created ears, hair, and manes from scrap cardboard. Be sure to leave a little extra cardboard attached to the base of the ears to make them easier to glue on, just fold the extra cardboard over to create a tab. 
        •  05Add Finishing Touches
          Use paint pens and markers to add detailing to your egg accessories. When decorating the cardboard, remember to paint the back too. 
        •  06Assemble Your Cozy Dinkum Egg
          Glue the ears, hair, and manes to the eggs. If using PVA glue, hold the ears in place until the glue is tacky, then use masking tape to keep them in place until the glue sets. Alternatively, always ask a grown up for help when using a hot glue gun.


        Voila! Four new friends for Easter bunnies everywhere to play with. 
        Collect all four new Cozy Dinkums for your little tribe.


        ]]>
        https://claycountyduilawyers.com/blogs/olli-ella-blog/curate-a-calming-nursery-for-your-baby 2023-02-05T19:02:26-08:00 2023-04-30T20:42:55-07:00 Curate A Calming Nursery For Your Baby Customer Happiness Account Create a calming space to send your little one off to the land of nod. Here are some of our must-have pieces and top tips for the newly most important (and stylish) room in the house.

        More

        ]]>

        Sleep. The dream every new parent is chasing. But how do you tell your baby, with no concept of time, that it’s time to rest so mama can catch up on her Netflix watch list? Start by creating a calming space to send your little one off to the land of nod. Here are some of our must-have pieces and top tips for the newly most important (and stylish) room in the house.

        ~

        Choose Your Color Palette

        Babies love bright colors, but muted tones are best for relaxation, so which is right for your nursery? If the goal is to create a calming space to encourage sleep, soft hues are “important for a baby’s brain development because they offer a much-needed rest”, says Dr Harvey Karp, MD, FAAP, the founder and CEO of Happiest Baby. Dr Karp says stimulating colors do help a baby’s brain develop and aid in their learning. But consider packing these treasures away when it’s naptime.  

        Store toys elegantly in the Tulip Basket or Lily Basket Set when it’s time to sleep.

        Introduce Snuggly Bunkmates

        Cuddly toys are beneficial for sensory development, emotional growth, and developing social skills. From 12 months +, comfort your little one and encourage them to self-soothe with a snuggly pal.  

        Sleepovers are more fun with friends!

        Create A Space Dedicated To Diaper Changes

        Babies and toddlers are wriggly little things (IYKYK). Keep them safe (and you sane) in one of our cult-favorite Changing Baskets. A calming bedtime routine will assist your little one at the end of the day. Consider a warm bath, then lay your little one down in one of our comfy Changing Baskets for a massage and PJ change. The best part? They’re portable and grow with your littles. When your diaper days are over, use one as a toy basket or coffee table tray.  

        Waiting on a surprise? Pair your Changing Basket with a gender-neutral Luxe Organic Cotton Liner.

        Storage, Storage, Storage

        For the tiniest people, babies come with a lot of baggage. Which they incidentally love to spread around the house. Consider portable storage solutions like the Rattan Wamble Walker. As well as toting treasures, the Wamble Walker makes a fabulous companion as your child grows and develops, supporting and encouraging your little one as they explore the world around them. An added bonus – walking with the Wamble Walker will burn off that extra energy before bedtime!  

        Keep pacifiers and other essentials on hand by fastening a Mini Chari Basket to the crib bars.

        The Finishing Touches

        We love seeing claycountyduilawyers treasures grow with your little ones. Start their collection with our Nursery Inspiration Guide. 

        SHOP NOW

        ]]>
        https://claycountyduilawyers.com/blogs/olli-ella-blog/beep-beep-cozy-dinkums-coming-through-in-their-very-special-diy-wagons 2023-01-18T19:46:58-08:00 2023-01-18T20:44:34-08:00 Beep Beep! Cozy Dinkums coming through in their very special DIY wagons claycountyduilawyers Admin Beep Beep! Cozy Dinkums coming through in their very special DIY wagons. We've teamed up with the very talented cardboardfolk to create some trendy transportation for our Cozys to ride in Style. Follow along to create you own! 

        ~

        It’s craft time!

        .

        • 01Create the shape
          Close up your mailing box (use tape to secure it if required) then use a box cutter and steel ruler to cut out a rectangle in the top of the box.
          Our cut out is 10cm x 13cm.

        • 02Create your Cozy face
          Create a face for your wagon! Use the extra piece of cardboard to cut out ears and glue them to the front face of the box. We used coloured paper to cut out extra details for the ears and face and glued them in place. Then draw a sleepy face on your wagon to match your cozy dinkum!
        • 03Create your wheels
          Make some wheels for your wagon by cutting out 8 circles from the extra piece of cardboard, ours are 6cm in diameter. Glue the circles together in pairs to make 4 wheels.
        • 04Decorate your wheels
          Decorate the wheels by cutting out fun shapes from the coloured paper and gluing them on.
        • 05Make your wheels turn
          To make the wheels turn, poke holes in the centre of each wheel with the kebab skewer and cut the paper straw in half. Thread on one wheel, then ½ a straw, then another wheel onto the skewer - if you need, cut the skewer down to size to fit your box. Use a small drop of white glue to keep the wheels in place. Repeat for the other set of wheels.

        • 06Attach the wheels
          Attach the wheels to the underside of the wagon by using tape to stick the straw to the box.The kebab skewer should be able to turn freely inside the straw
        • 07Bring it all together
          Use a sharp pencil to poke a hole in the front of the wagon
          and thread through the string. Tie a thick knot on each end of the string to stop it from pulling through
        • 08Ride in style!
          Pop your Cozy Dinkum inside the wagon, ready to ride in style
          ]]>
          https://claycountyduilawyers.com/blogs/olli-ella-blog/beyond-your-wildest-dreams-learn-pretend-play-with-holdie%E2%84%A2-animals 2023-01-16T19:47:37-08:00 2023-01-16T19:47:37-08:00 Beyond your wildest dreams...learn pretend play with Holdie™ Animals claycountyduilawyers Admin At claycountyduilawyers, we believe in the power of imagination and the joys of pretend play. Our Holdie™ Animals are the perfect companions for setting up backyard adventures, puppet shows, and small missions that will keep your little ones entertained for hours. We understand the importance of fostering creativity and role-playing, and we're here to help you make the most of these experiences with your children. Discover our tips on how to engage in pretend play and make it even more exciting with our Holdie™ Animals.

          ~

          Pretend play, also known as symbolic play, is a stage of play in which children use objects and actions to create a make-believe world. They assign roles, give meaning to objects, and create new realities through their imagination. It is a way for children to express themselves and develop their cognitive and social skills. And we are all about it! Here's some of our favourite ways to do it:

          1. Unleash your imagination and play pretend with our Holdie™ Animals! We've crafted a unique backstory for each animal to get you started, giving you, your little ones and their friends the freedom to pick their favourite and fully immerse themselves in role-playing adventure.

          2. Get up close and personal during pretend play by positioning yourself at eye level with your child. This can be done by sitting on the floor or sitting across a table from each other. By being face-to-face, your child will feel more connected to you and will be able to see your facial expressions, gestures, and actions, enhancing the pretend play experience.

          3. Keep an eye out for what catches your little one's fancy. Once you've set out the Holdie™ Animals, see which one they gravitate towards. If it's Elephant, hop on board and play with it! Following their lead will make them excited to play with you.

          4. If your little one is new to pretend play, give them a helping hand by starting the fun yourself. Grab one of their favourite toys and show them how to play by doing a simple action, like making animal sounds that match the Holdie™ Animal! This will give them an idea of what to do and get them excited to join in.

          5. Get "into" the play! It is easy to become a "narrator" when playing with your child, and provide a play-by-play from the sidelines about what your child is doing. Being ‘in' the play gives your child more chances to learn because it allows for more interaction and conversation.

          6. Have fun! Seeing the world of imagination through your child's eyes creates a new perspective for both of you. You'll never know what will be thought up next!

          5. Dive into the playtime! It's easy to stand back and narrate the action, but getting "into" the play makes it more fun for your child and provides more opportunities for learning.

          Holdie™ Safari Animals

          Meet Zebra, the playful and fun-loving animal of the Holdie™ world. He's always up for a game of hide and seek, but don't be fooled by his black and white stripes, he's easy to spot. And when it comes to parties, Zebra is the one to call - he's the ultimate party animal!
          Despite his size, Elephant is the kind and gentle leader of the Holdie™ Safari crew. He's in charge of all water play and loves to use his trunk to give everyone a refreshing spray on hot days. He's the captain of the aquatic fun in the Holdie™ world.
          Rhino is a helpful and reliable animal in the Holdie™ world, always willing to lend a hand. He's got the strongest horn in the land, making him the perfect animal for moving heavy objects like boulders or fallen trees. He also has a playful side, often galloping around trying to shake off the birds that like to perch on his back. Rhino is always there to help and bring some fun to the adventure.

          Holdie™ Savannah Animals


          Introducing Lion, the ruler of the Savannah, known for his powerful roar that echoes throughout the land. He takes great pride in his appearance, often spending time grooming and maintaining his magnificent mane in the sun. Despite his fierce reputation, Lion is a kind and big-hearted animal who loves to take care of himself and his friends.
          Meet Hippo, a lovable and sometimes shy animal who is always happy to see a friend. He's a big fan of splashing around in the rivers and streams of Holdie™ world, and likes to surprise the animals that come to the water hole for a drink. Despite his size, Hippo is a friendly and playful animal that's always looking for a good time. Can you imagine a hippo doing a bellyflop?
          High-up above the Holdie™ world is Giraffe, our long-necked friend. He can often be seen collecting high-up snacks to share with his companions. He also acts as a lookout for the Holdie™ Savannah and loves to bust a move every now and then. He chats to the birds, snakes and koala's in the trees. Despite his height, Giraffe is a gentle giant who is always happy to share his treats with his friends.

           Holdie Marine Animals
           

          Meet Octopus, our friend with many talents. She is known for her ability to multitask, and can often be found using her eight long legs to help clean up litter and debris from the Holdie™ Ocean floor. She's a mighty helper and always looking for ways to make the ocean a cleaner place. She loves squeezing through small spaces and coral crevices, exploring and dancing through day and night.
          Then there is Turtle, the traveler of Holdie™ world's vast blue seas. He cruises and navigates through the currents and waves, visiting far-off islands with palm trees and giant sea shells. Turtle is a wise and experienced storyteller, who loves to share tales of his adventures and the knowledge he's gained from meeting all of the creatures in the deep blue sea. 
          Don't be intimidated by Shark's toothy grin, he's a gentle and friendly Holdie™ who loves nothing more than a chat and a playful splash. He's the go-to friend for anyone who feels worried or sad in Holdie™ world. He's also an expert on the best spots to head for lunch, to chase boats zipping by and to watch the world from. Despite his slightly intimidating appearance, Shark is a kind and compassionate Holdie™ who's always there for his friends.


           Holdie™ Ocean Animals

          Meet Whale, the giant of the Holdie™ Ocean, known for his love of singing. He often serenades the Holdie™ Mermaids as they ride on his tail. He's also been known to give a few snails a lift to tour the sea. Dolphin, is Whale's cheeky and playful ocean dweller pal, who loves to show off her tricks and is always eager to play, especially bodysurfing and racing the Holdie™ Mermaids through the ocean waves. Dolphin likes collecting seaweed and balancing shells on her nose. She's got some great tricks to share. And we must not forget Stingray. Stingray is another beloved ocean friend, who loves to share stories of sunken treasure and hidden caves in the depths of the Holdie™ Ocean. He's the perfect companion for adventures and known for his constant smile. He loves a tickle, and he's a huge fan of balancing on funny objects!


          Let the good times roll! Playing with your child's imagination opens up a whole new world for both of you. You never know what they'll come up with next, and that's part of the fun. So, relax and enjoy exploring!


          ]]>
          https://claycountyduilawyers.com/blogs/olli-ella-blog/get-sparkly-this-new-years-with-a-diy-disco-ball 2022-12-27T03:25:37-08:00 2022-12-27T03:25:37-08:00 Get sparkly this New Years with a DIY Disco Ball claycountyduilawyers Admin 🎶  Let the countdown to 2023 begin! We've teamed up with Cardboard Folk and The Glitter Tribe to create our very own DIY disco ball to move and groove into the new year! Fancy making your own? Read on for step-by-step instructions to sparkle your way into the New Year!

          ~

          It’s craft time!

          .

          • 01Create ball shape
            Create a sphere by scrunching up left over wrapping paper into a ball shape. Layer pieces of paper over each other until you’re happy with the size of your ball, we made ours around 16cm in diameter to suit our Cozy Dinkums, and 8cm in diameter to suit our Holdie Animals.
          • 02Wrap tight
            For the final layer of your ball, wrap it tightly with aluminium foil. This will keep the paper in place and also give you a nice shiny base to work with.
          • 03Add sparkles
            Take the scrap cardboard and use an old paintbrush to cover it in white glue. Sprinkle generously with Bio Glitter and shake off the excess. Repeat for as many colours as you plan to use.
          • 04Create your square tiles
            Cut the cardboard into small squares with a pair of sharp scissors or a box cutter. We used a pencil and ruler to get the squares the same size, approximately 1.5cm for our large Cozy Dinkum sized disco ball and 1cm for our small Holdie sized disco ball.
          • 05Trace and place
            Use a round object to trace a circle onto the ball with a black marker, this will give you a guideline to start setting out your cardboard glitter squares.
          • 06Glue down your squares
            Glue your glittery squares onto the ball with a hot glue gun (ask an adult to help!). Work around the ball in bands, changing colours to suit your design, until the ball is covered in a mosaic of square tiles. Leave a space for the final tile at the top, that's where your string will go to hang the ball.


          • 07Attach the string
            To attach the string, take one of the squares and poke a hole in it. Thread the string through the hole and tie a knot in the end to keep it in place, then anchor the square and knot to the disco ball with hot glue.

          • 08Lets boogy!
            Give your special friends some party hats, hang your disco ball and get ready to ring in the new year!
            ]]>
            https://claycountyduilawyers.com/blogs/olli-ella-blog/a-very-festive-diy 2022-12-14T13:07:13-08:00 2023-12-14T19:51:28-08:00 Dinkum Cardboard Christmas Play Prop claycountyduilawyers Admin Create your very own cardboard fireplace and stocking play prop for all your Dinkum friends! We teamed up with @cardboardfolk and @glittertribe (for guilt-free, biodegradable sparkle) on this glitzy craft. 

            More

            ]]>
            Create your very own cardboard fireplace and stocking play prop for all your Dinkum friends! We teamed up with @cardboardfolk and @glittertribe (for guilt-free, biodegradable sparkle) on this glitzy craft ✨ 

            ~

            It’s craft time!

            .

             DIY Dinkum Festive Stockings and Fireplace

            • 01Stocking template
              Print out the Stocking Template and cut around the outlines, then use a pencil to trace around the stocking onto the scrap piece of cardboard. Carefully cut around the outline with a box cutter making sure to protect your work surface with a cutting mat or scrap cardboard.
            • 02Paint Stockings
              Paint your stockings to suit your Dinkum or Dinkum Dog’s personality!
            • 03Personalise
              Use a white paint pen to write your special friend’s on their stocking
            • 04Add your sparkle
              Add Bio Glitter from The Glitter Tribe to your stockings for some guilt-free sparkle! Use an old paintbrush to apply the PVA glue, sprinkle over glitter and then shake off the excess.
            • 05Trace your fireplace
              Take the large box and tape up down any loose flaps. On the front of the box, draw an arched fire place with a pencil and steel ruler. We used a dinner plate to create the arc at the top.
            • 06Cut it out
              Carefully cut out the fireplace using a box cutter and a steel ruler as a guide for the straight edges.


            • 07Paint the front
              Use a white paint pen to add some brick details to the front of the fireplace, if you don’t have a paint pen, you can always use white paint for this step.

            • 08Don't forget the mantle piece!
              Tape or glue the Honeycomb Packaging to the top of the box to create a mantle piece.
            • 09Place your stockings on the fire place
              Attach the Stockings to the top of the fireplace with double-sided tape. To give them a nice shadowline, we also added some small squares of thick cardboard to back of the stockings first.
            • 10Time to toast some marshmallows!
              Add your special Dinkum Friends, ready for some festive fun!
              ]]>
              https://claycountyduilawyers.com/blogs/olli-ella-blog/diy-narnia-inspired-wardrobe 2022-11-09T14:36:26-08:00 2023-12-14T19:59:20-08:00 DIY Narnia-inspired wardrobe claycountyduilawyers Admin “They open the door and enter a world…” into a magical playscape for Dozys and Cozys. The best part? Kiddos will love this @raisingwildones play prop year-round.

              ~

              It’s craft time!

              Make your very own DIY Narnia-inspired wardrobe

               DIY Narnia-inspired wardrobe

              • 01Measure out cardboard
                Measure 1 Piece of Cardboard 40cm (15.5 inches) wide by 50cm (19.5 inches) in length. Draw Lines to have cutting references.
              • 02Cut
                Cut out using an Exacto knife, box cutter, or scissors. Measure from the bottom of the piece of cardboard 20cm (8 inches), mark, then continue to measure up to 32cm (12.5 inches). 
              • 03Measure and cut doors
                Draw a vertical line connecting all the measure marks you have made. At the 32cm mark measure 13cm (5 inches) to the left, and then 13cm (5 inches) to the right. You will now have a "T" marked on your piece of cardboard. Cut the "T" mark to form your doors. Place a ruler on the edge of one door to assist in folding the door open. Repeat for the opposite side.
              • 04Sponge paint background
                Using a sponge paint the background white. Be sure to leave the doors unpainted. Let dry
              • 05Draw your magical set
                Using White glue decorate the doors. Outline, draw stars, a tree whatever your heart desires. Let dry, this make take a day to fully dry
              • 06Create your Narnia forest
                Collect twigs from outside or paint the trunk of the trees with brown paint. If using twigs carefully use a hot glue gun or glue to secure the piece of cardboard. Once tree trunks are in place using green paint and a fork alternating sides using the fork as a stamp to create the needles. Let Dry.


              • 07Paint doors
                Using brown paint, paint the doors, you may need more than one coat. Let dry. Paint dowel rods with the same brown paint used for the doors.

              • 08Secure door
                Once doors and dowel rods are dry, secure the dowel rods on the sides of the doors. Then glue the wooden beads where you would like the door knobs to be.
              • 09Place snow balls
                Lightly separate the cotton balls and glue them to the bottom working your way up 14cm (5.5 inches) so the snow can be visible when placed in your Wonder Wagon.
              • 10Create the rest of the magical snowscape
                Using glue create snowflakes, stars, circles of glue, and lines on the tree needles. While the glue is still wet, sprinkle glitter generously over the glue. Placing the piece in a container to catch the glitter gently lift it to slide and shake the glitter off. Revealing the now sparkly glue designs.

              • 11Measure and cut the back of wardrobe
                You will now measure the back pieces that will create your Wardrobe for your new friends. You will have 4 pieces. Measure 1 piece 24cm (9.5 inches) wide by 32cm in length. Measure 1 piece 13cm (5 inches) wide by 24cm (9.5 inches) in length. Measure 2 pieces 13cm (5 inches) wide by 24cm (9.5 inches) in length. Cut out the 4 pieces.
              • 12Assemble the back of wardrobe
                Using tape place the 24cm (9.5 inches) by 32cm in the centre, and place the two 13cm by 32cm on each side. Place a piece of tape on the sides measuring 24cm vertically. Place the 13cm by 24cm (9.5 inches) piece on top of the 24cm (9.5 inches) by 32cm piece, lining up the 24cm (9.5 inches) sides. Place a piece of tape horizontally to attach. Now fold at the tape sites to form a box. Place tape on each of the corner pieces.
              • 13Assemble the whole wardrobe
                Using tape you will now line up the doors and the box you have created. Place tape along all 3 sides to secure the front decorated piece with the box.
              • 14Voila!
                Place the Wardrobe in your Wonder Wagon and place your new friends inside! Make sure to give adequate room for the doors to open so place the Wardrobe with the back piece touching the back of the wagon.
                ]]>
                https://claycountyduilawyers.com/blogs/olli-ella-blog/whats-on-our-teams-festive-wishlist 2022-11-03T20:54:20-07:00 2022-11-03T21:37:24-07:00 What's on our team's festive wishlist! claycountyduilawyers Admin The most wonderful time of the year, full of family, friends and delicious feasts. We all love seeing the look on a loved one's face when gifted a sentimental present. There is definitely a process of love and thought when deciding what goes under someone's tree. Our team wanted to share with you their gifting picks and why they chose them for different individuals.

                ~


                Fawny Twinkle

                The sweetest new edition to the Cozy family, Fawny Twinkle and twin Fawny Twiggy love the holiday season. 


                “Twinkle is so soft and cuddly, perfect for baby’s first gift. I love the subtle holiday theme.”
                Claire , Head of Sales, Australasia  


                Rattan Red Mushroom Basket

                A fantastical home for our Holdie fairytale folk and other woodland creatures. Or an adorable accessory for your day-to-day! 

                “Nothing beats the claycountyduilawyers Mushroom Basket, I personally love it as a clutch – such a fun talking piece!”
                Hannah, Account Manager, AUS


                 Playpa- The Land Before Time

                There are Dinos, volcanos and fossils that your kiddo (or you!) can color, paint, and play on, providing countless hours of artistic fun! Create stories on it, play with figurines, and invent games on it. (It also makes for fun wrapping paper!) 

                "Organised fun for the whole family whilst you let your roasties and sprouts go down!”
                Lucy, Customer Happiness

                 Dinkum Doll Cotton Daisy Dress  

                Just like the dresses that grandma used to make {only better because it’s Dinkum Doll sized!} the Daisy Dress is filled with those handmade yesteryear vibes.

                “The embroidery is so detailed and cute; it completes the outfit”
                Dewi , Head of Sales, Europe

                 Ink Rattan Cabouche Basket

                A basket full of presents, or a basket full of blankets, however you choose to use this sweet set, it will add a touch of effortless elegance and tactile comfort to your home.

                “The most gorgeous basket set for storage. Looks great in the kids room or living room”
                Lisa, Head of Sales, Americas

                Dinkum Dog Honey

                The Dinkum Dogs are the most low-maintenance pets you could ever take home – all they require is some love and snuggles to keep that tail wagging!

                “It’s a great starter dog for kids to learn how to take care of a pet.”
                Merryn, Account Manager, US


                 Cozy Dinkum Bunny Moppet

                Bunny Moppet, so cuddly and cute, loves to doze in its soft fluffy suit. Made for snuggles and snoozy days, this velvety little Cozy loves to play! 


                “It's the plush version of Moppet & it's a great ‘security blanket’ for children all year round.”
                Maritess, Sales Admin


                Dinkum Dog Buddy

                Buddy enjoys playtime with kiddos, walks with the Dinkum Dolls and they’re mad about their bones.

                "Dinkum Dog Buddy is the perfect gift for my toddler who's Dog obsessed"
                Kayla, Marketing Co-ordinator, AUS

                Cozy Dinkum Fawny Twiggy

                Fawny Twiggy is a beautiful gift for newborn babies or would make a wonderful addition to any stocking this festive season!!

                “Fawny Twiggy is the sweetest new Cozy, perfect for new little babes .”

                Andrea, Product Assistant, AUS

                Holdie Animals Marine

                The Marine wildlife of Holdie™ World are wonderful and diverse. These three friends are all very different, but that doesn't stop them from having fun together.

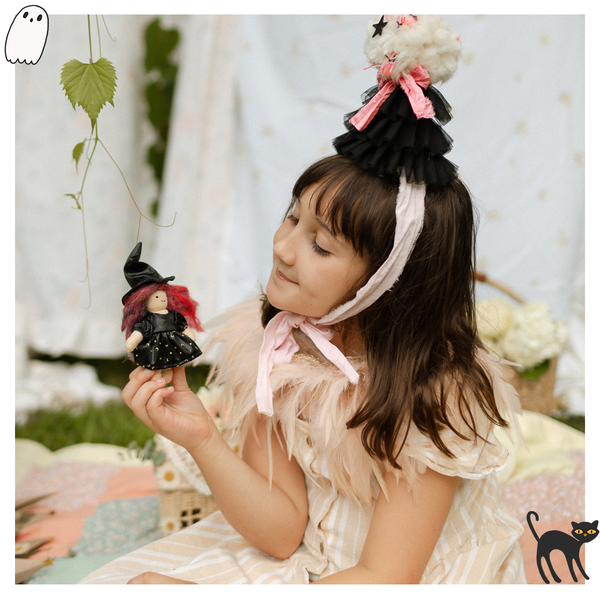
                “The sweetest little things, perfect for imaginative play!”

                Netty, General Manager, AUS

                Nyla Changing Basket

                The Nyla Basket is a fresh take on a traditional changing mat. Handwoven using the soft natural fibres of seagrass, the Nyla basket can be used after your little one has outgrown it, as a toy storage or as a display basket for dried blooms, or your favourite books, perhaps.

                “With bub on the way, the Nyla changing basket is the perfect addition to our nursery”-

                Tara, Global Marketing Director, AUS

                ]]>
                https://claycountyduilawyers.com/blogs/olli-ella-blog/diy-dinkum-dog-beds 2022-10-26T19:50:55-07:00 2022-10-26T21:43:45-07:00 DIY Dinkum Dog Beds claycountyduilawyers Admin We have teamed up with the talented @My wee folk to create your Dinkum Dogs their very own DIY bed 🐶 A fun and easy craft that will have our Dinkum Dogs' tails wagging and set them up for the comfiest naps. 💤~

                It’s craft time!

                Make your very own DIY Dinkum Dog Bed


                Watch video below for extra guidance!


                • 01Cut
                  Cut a 35cm diameter circle out of your cardboard and fabric
                • 02Glue
                  Glue your fabric circle to the top of your cardboard
                • 03Cut and Place
                  Cut a 50cm diameter circle out of your fabric then place your 35cm circle on top of the 50cm with the cardboard side facing down. You can use any fabric of your choosing! Be it an old bedsheet, nightie, or a cute old vintage print (or grandma’s pyjamas!)
                • 04Stuff with wood wool
                  Create a ring around your 35cm circle with the wood wool. Ensure the wood wool is densely packed.
                • 05Tuck your bed
                  Pull the excess fabric from your 50cm circle over the top of wood wool, tuck it in and glue in place. Continue around the circle until you create a doughnut shape
                • 06Voila!
                  Allow the glue to dry and then you are ready to play


                ]]>
                https://claycountyduilawyers.com/blogs/olli-ella-blog/diy-reindeer-antlers 2022-10-19T20:00:45-07:00 2022-10-19T20:00:45-07:00 DIY Reindeer Antlers claycountyduilawyers Admin Your littles can play parent to their new Cozy Fawnys with their grown-up Reindeer Antlers! Learn how to make your very own pair in this DIY craft from our friend @raisingwildones 🦌✨

                ~

                It’s craft time!

                Make your very own DIY Reindeer Antlers


                Watch video below for extra guidance!


                • 01Trace
                  With a pencil, mark out two of your Reindeer antlers on a piece of felt of your choice.
                • 02Cut
                  Using scissors, carefully cut out two strips of brown felt (the band of your ears)
                • 03Glue
                  Glue the edges of your Reindeer antlers connecting them so there is an opening in the top. 
                • 04Stuff ears with cotton
                  Using cotton buds, stuff the inside of each ear to give them their shape and glue the seams together. 
                • 05Glue ears to the band
                  Place down the first piece of the brown band felt and glue the antlers on, then place more glue on the base of the antlers. 
                • 06Glue top
                  Place down your other piece of the brown band felt and connect them, allow to dry. 
                • 07Measure width of head
                  Before connecting, make sure to measure the band to the width of your little one's head so it fits just right! 
                • 08Attach Velcro
                  Attach your velcro to each endpoint of the band and voila! You have your very own set of Reindeer antlers!


                ]]>
                https://claycountyduilawyers.com/blogs/olli-ella-blog/the-switch-witch 2022-10-13T14:58:44-07:00 2022-10-13T14:58:44-07:00 The Switch Witch claycountyduilawyers Admin More

                ]]>
                 
                ~

                We all know of the tooth fairy, but have you heard of the switch witch?

                In case you're not familiar, the Switch Witch is a good witch that visits your home on Halloween night while the little ones sleep. She takes (not steals, as she is an invited guest!) the candy your child has decided to trade with her and leaves toys in its place.
                .

                  What is her name?

                When you adopt a Witch, she comes into your home and will be part of your family forever. Although some Switch Witches you may come to know, your very own Switch Witch is yours to name.
                 

                Where does she live?

                Your Switch Witch lives in Witchy World high above the clouds. Lots of good and fun magic takes place here. She can arrive at almost anytime, though they tend to show up in early October to prepare for Halloween. Once in your home, she'll happily take up residence in a mushroom or castle with your other magical friends!

                How to introduce the Switch Witch to your little one!

                Give them some backstory on who the Switch Witch is.
                Have them decide, in advance of trick-or-treating, how much candy they're willing to give to the Switch Witch. 
                Have them write a note to the Switch Witch asking for the toy(s) they would like, and the rest is magic!
                ]]>
                https://claycountyduilawyers.com/blogs/olli-ella-blog/dress-like-a-dinkum-some-not-so-spooky-dress-up-inspo-for-halloween 2022-10-06T19:41:38-07:00 2023-07-05T13:21:13-07:00 Dress like a Dinkum! Some not-so-spooky dress up inspo for Halloween claycountyduilawyers Admin

                More

                ]]>
                Twinning is winning we know this for sure, dress your kiddo like their Dinkum Doll for an adorably unique Halloween costume! Here are some spooktastic (but not so spooky) creative dress-up ideas for your little ones' Halloween. 

                ~

                The Explorer

                This little duo is set to adventure into the wild witchy Halloween streets. Don't be fooled they may not look so spooky, but you can guarantee they'll track down all the tasty treats! All you'll need is an explorer hat and a little camera or binoculars to match your Dinkum.

                The Teddy

                Definitely the cutest grizzly bear you'll ever meet, these two little bears will be out in search of some delicious honey candy, they can be pretty cunning if they have to! Keep your eyes peeled for some Teddy tricks. You'll want a fluffy hat or a cute set of ears to match your Teddy Dinkum.


                The Bunny

                Beware of those black cats while you are hopping around on Halloween eve! This matching Cozy Dozy Dinkum bunny outfit can be easily pulled off with some ears and a carrot to counteract the sugar rush!

                Trick or Treat!

                We can't forget about the most important element for a successful night of trick or treating, a basket to hold all the treasures! These fantastical baskets can be used to collect all your treats and stash them safely to keep.

                Further Inspo! 

                Be it a fairy, a gogo dancer or a Dinkum astronaut, our Dinkum friends have you covered for matching costume inspiration. 


                ]]>